
How to draw a painting of the night sky with oil paints? Drawing the sky has a special place in the art of drawing. Especially drawing the night sky is a very special landscape subject with little details. It is relatively easy to draw the sky during the day while painting a landscape because we can use many different colors together. When we want to depict the sky at night, our options are more limited because we need to use similar colors. However, we can give our picture the necessary harmony with the moon and star details.
First, we start with the colors you should use:
- Primary blue
- Ultramarine blue
- Violet
- Pink
- White
How to draw a painting of the night sky with oil paints?
The Painting Steps
- Then paint with dark blue paint starting from half of the places you painted light blue to the middle of the canvas.
- Blend the intersection of the light blue and dark blue paint and get a smooth transition image of the two colors.
- After this step, you should get a light blue to dark blue image towards the bottom of the canvas. Then continue to paint your canvas down with a dark blue color, while you start using some purple paint and continue to paint down, mixing it with dark blue.
- Your canvas should be painted from top to bottom in light blue, dark blue, and purple, respectively.
- You should blend the junctions of the colors beautifully and create a smooth transition image. Now you can add pink paint starting from the bottom of your canvas.
- Start painting the canvas underneath by making side strokes with your brush. Continue to paint with your pink paint by blending it down the middle of the dark blue and purple parts.
- If you have painted your entire canvas, now, using a thin brush, drip white paint onto the canvas. During this process, you can use your finger to splash white paint from brush to canvas.
- Now take some black paint on a thick brush again and paint the bottom of your canvas two or three fingers thick with black.
- Now, with the help of a clean fan brush, let’s draw grass with black paint on the black part from bottom to top.
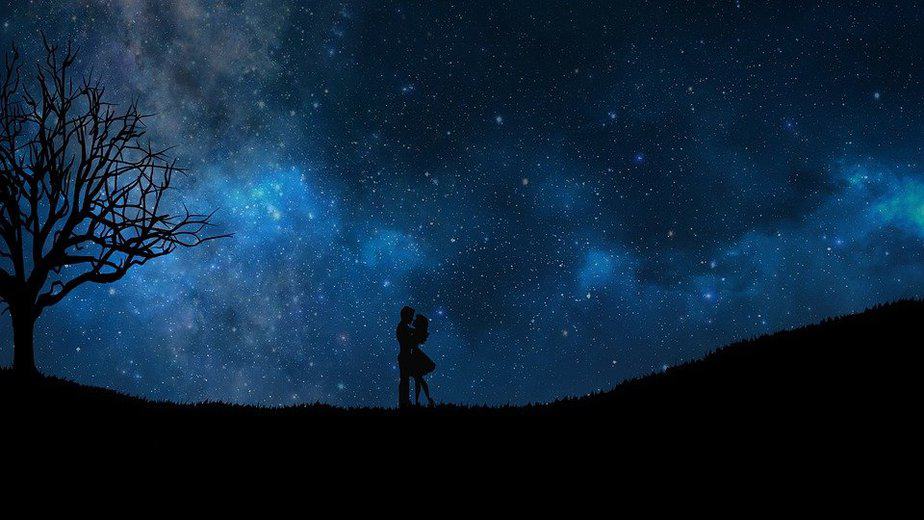
- After drawing the grass, let’s draw a medium-sized tree in the center of the canvas using black paint. You can draw leaves on the ends of the tree branches with the help of a fan brush.
Drawing a night sky with soft pastels
Drawing a night sky image using pastel paints has the same logic as drawing using oil paints, except for a few details. While oil paints are in liquid form, pastels are solid, so drawing using crayons may be more difficult for some. Also, when painting with oil paints, it is easier to blend the colors than crayons.
- First, let’s start by fixing our paper or canvas on the surface we will paint with tape or a different material. Our paper or canvas should stand transversely rather than vertically.
- After fixing our paper, we can start to paint using black paint. Let’s paint the top of the paper sideways with black crayons. We have to paint each color we use from top to bottom in 2-3 finger thickness.
- Let’s paint each color horizontally at a thickness of 2-3 fingers, alternately from top to bottom, with black purple and dark blue, and light blue crayons, with a little space at the bottom.
- This point needs some attention. Now let’s fold a napkin and fold it into a small ball, then use it as an eraser to start going over the colors from the bottom up, so the colors will soften and blend, just like we do with oil paint.
- Let’s be careful to do this process first from bottom to top and then from top to bottom. Let’s make sure that all the colors blend softly. After the blending process, let’s draw a child figure sitting on the ground using a pencil. If you want, you can draw a different figure on the night view. This is optional.
- While painting, draw a hillock using black crayons on the part we left blank while painting and marked the boundaries with a pencil. After painting the inside with black crayons, soften the areas you painted with a napkin using the previous technique.
- You can depict the child’s figure while blowing foam bubbles or holding many balloons of different sizes. At this stage, first, draw the figure with a pencil, paint it inside it, then go over it with a felt-tip black pen and make it clear. Using the same method, let’s draw a tree figure in front of the child figure.
- Let’s cut the middle of a4 paper into a medium-sized circle, and we will use this paper as a template while drawing the moon. After painting the inside of the circle white with buffer movements, let’s draw the moon by softening it with the napkin method.
- If there is no white felt-tip pen, let’s draw the stars by making small touches on the dark areas with white crayons. Then, with the help of a pencil, we can place small bird figures on the light-colored areas.
- You can remove the tapes you used to fix the paper, and it’s that easy to make a detailed night drawing with a few simple methods.
Final Steps- How to draw a painting of the night sky with oil paints?
- Fix your paper as we did in the crayon example.
- Make colors with a brush in advance.
- Start with light shades of the sky.
- Start with the dark color you chose from top to bottom and paint in the light.
- Spray water with a toothbrush before dried. Or you can use a sprayer upward for little stars.
- Blot little spots with a folded tissue. Be careful not to go too much.
- Leave the gradation as it is. At this stage, you can dry it a little with a blow dryer.
- Scatter high-dense white paint with a toothbrush.
- If you have a home garden or a different figure you want after your background dries, you can draw on this landscape with the help of different size brushes and colors.
- Sprinkle dark colors on your figures with the help of a toothbrush.
We have examined three different night sky drawing techniques, and in fact, all of them are basically based on similar methods. Since the paints you use are different, you will get different results, but you can reach the right image by following similar steps.
Drawing is a very detailed art that requires attention, but you can make your job easier by learning small methods and tips. Never give up trying.
Here are some tips for oil painting and watercolor techniques before finishing
- If you are using oil painting for the first time, you should try small sketches before starting your main painting.
- It is very important to learn the color and color mixes to understand the paint’s structure and the result on the canvas.
- You should invest in brushes in all areas of painting, but if you are starting, only a few high-budget brushes will do the job at first, but be sure to get quality materials.
- You don’t have to think. You have to use all the colors in your palette to start with. Even start by using limited colors.
- Keep your brushes and paint clean and tidy at all times. This will increase your desire for painting.
- When setting goals for yourself, instead of choosing complicated works, choosing works that are simpler and can be completed step by step will increase your motivation.
- When you want to concentrate your paint, you can use pine turpentine to dilute your acrylic paint thickener paint.
- Be careful not to leave your brushes in thinner for a long time. Even though they are of high quality, they may distort your brush’s form.
- Starting with small pictures first gives you a lot of material and technical development possibilities.
